
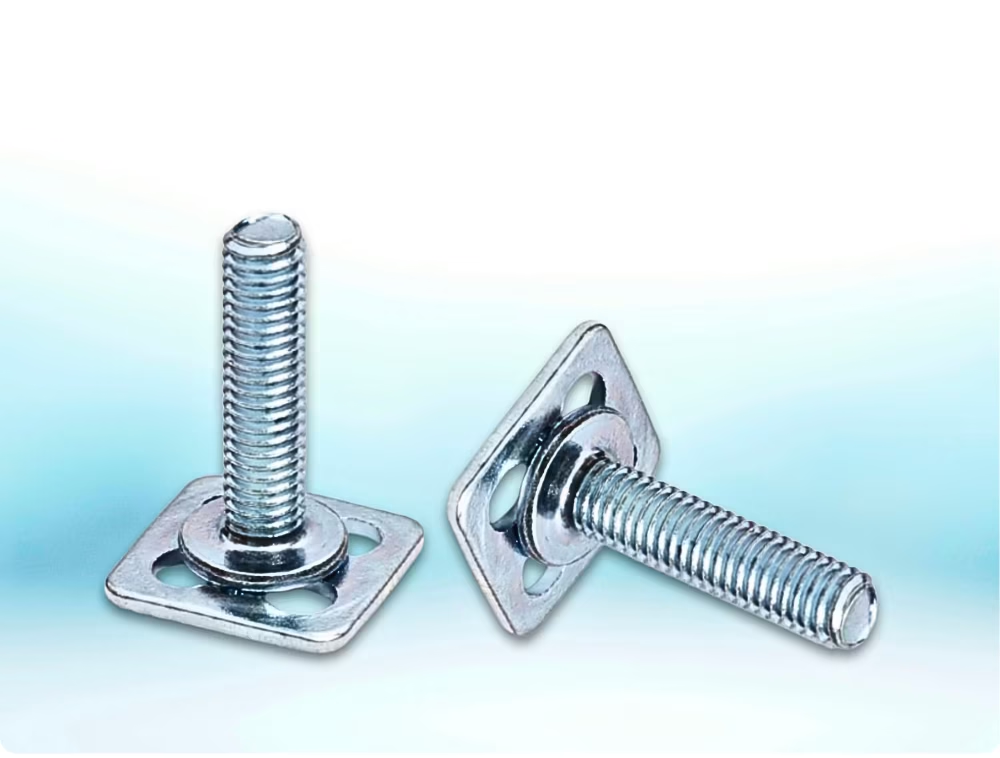
PSM Plas-Studs are spring steel fasteners designed for embedding into plastic or panel assemblies to provide captive threaded studs. They combine the resilience of spring steel with compatibility for thinner panels, enabling solid attachment points where standard inserts or nuts might be impractical. They are especially useful in panels or housings where a protruding threaded boss is needed without heavy hardware.
PL1 Series
For use in panels of 1.0mm minimum thickness
PL2 Series
For heavier loads and use in panels of 1.5mm minimum thickness
Material
Mild steel – zinc & clear passivated to BS 3382
N.B.
Dog point studs are also available on certain sizes – details available upon request.
When specifying, please state:
- Quantity
- Prefix (PL1 or PL2)
- Part No.
- Finish code (e.g. 5000 PL1-M5-16)
Plas-Studs Features & Benefits
Provides a captive stud rather than relying on a nut—improving ease of assembly.
Designed for relatively thin panel thicknesses (1.0 mm / 1.5 mm), making them ideal for lightweight or compact assemblies.
The spring steel construction gives elastic retention and resistance to loosening under vibration or movement.
The pre-applied finish protects against corrosion and ensures consistent contact.
Design & Technical Specifications
Panel Thickness & Series Selection
Use PL1 studs in panels that are at least 1.0 mm thick.
Use PL2 when panels are 1.5 mm or thicker—especially when higher loading or durability is needed.
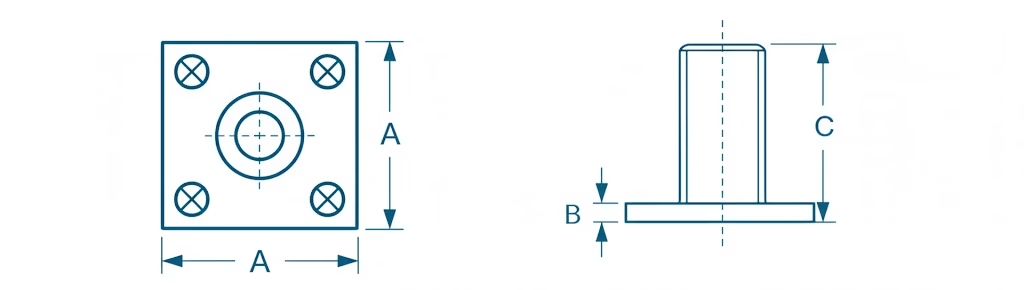
Dimensional Data & Tolerances
The manufacturer provides full dimensional tables: stud length, thread size, shank diameter, and tip geometry.
When ordering, you must specify the quantity, prefix (PL1 or PL2), part number, and finish code.
A typical part code example is “5000 PL1-M5-16”, where M5 is the thread and 16 is length in mm.
Plas-Studs Dimensional Data & Sizes

Installation & Best Practices
- Insert the Plas-Stud into a preformed or molded hole aligned with the panel surface.
- Use a pressing operation to seat the stud until flush or slightly below the plastic surface, ensuring the stud is straight.
- The dog point tip (if used) helps guide the stud into alignment with mating parts.
- Avoid applying torque on the stud during insertion; the securing force should come from press fitting, not twisting.